
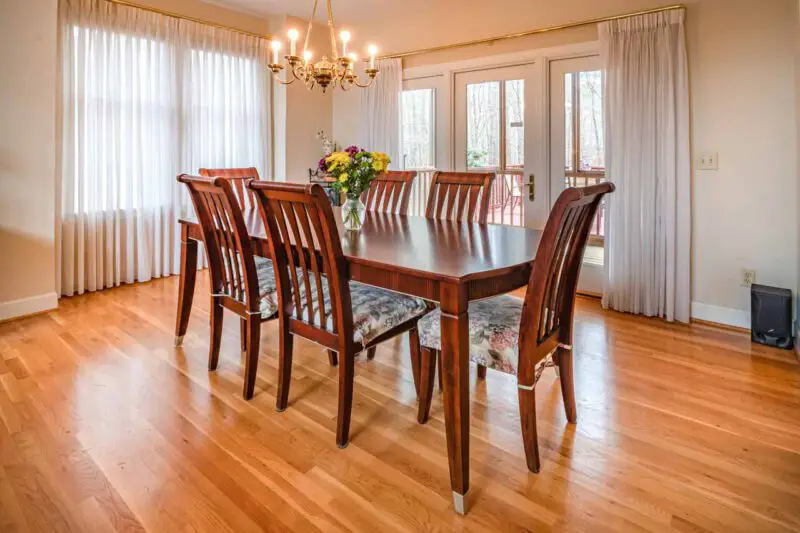
We often see a scratched up floor beneath the beds, sofas, chairs, and especially under the dining table. The sliding of furniture creates ugly marks and leaves an unpleasant environment for you. Rubbing and brushing cannot remove these marks.
On the other hand, brushing and rubbing can make those marks more evident. Unfortunately, those marks are usually made by your favorite furniture. But, you can’t just throw your furniture out for the sake of keeping your floor smooth.
Not only the floor; but the sliding of furniture can also harm the furniture itself.
There is a professional way to stop sliding furniture from damaging your floors. It is cost-effective, takes little effort, and you can do it yourself at home. So, let’s dive into this amazing DIY tutorial to make furniture grippers.
You May Also Read: Expert Ideas of DIY Furniture Sliders
DIY Furniture Grippers Ideas: Stop Furniture From Sliding On Floors
Whether it leaves marks on the floor or not, sliding furniture is always unwanted. When your floor is wooden it becomes even more problematic. Here, I am going to show you how to keep furniture from sliding on hardwood floors.
You can use non-slip furniture pads. You can buy them from any hardware store but I like to make things on my own. It saves money, there is no hard work involved, and most importantly you can customize the shape of the ones you make to match the exact shape of your furniture legs (round, triangle, diamond, rectangular shape, etc).
Without further delay, let’s start making DIY non slip furniture pads:
Make Sure you Have These Things:
- Hardware scissors
- Marker
- Thick scrap cardboard
- Grip liner
Take Measurements
First take measurements (length, width) of the leg of the furniture (take multiple measurements if your furniture legs are different from one another). Do you have the marker with you? Take it. Put one of your furniture’s legs on the scrap cardboard, and mark every end of every side of the furniture’s leg with the marker. Then take it out. You are done with the measuring part.
Cut the Scrap Cardboard
Here comes the cutting part. Use your scissors. Take the scrap cardboard and cut it according to the markings, now you have perfectly shaped cardboard to match your furniture leg. Cut it straight, bumpy or uneven cutting is not going to give it a nice look.
Make the Cardboard Thick Enough
If the cardboard isn’t thick enough you can add some more of it to make it thicker. Make it at least ½ inch thick. Don’t make it too much thicker than that though
.
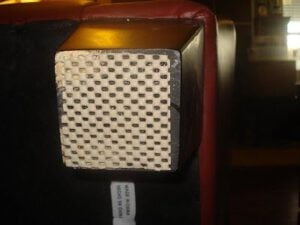
Grip Liner Cutting
You have the grip liner, haven’t you? This is the part that saves your hardwood or tile floors from ugly black spots. Place the scrap cardboard on the grip liner, and cut the liner according to the measurement of the scrap cardboard carefully. Now you have shaped cardboard, and shaped grip liner as well.
Your grippers are ready. You have done it. Be proud of yourself.
Perfectly Placing the Gripper
Place each gripper under your furniture’s legs. Now give it a try. Push it, push it the way your furniture gets pushed every day. If your furniture is not moving or sliding then you are fine.
If it is still moving or sliding, don’t be upset. It means your scrap cardboard or grip liners aren’t thick enough. Here you can add some craft foams (use silicon adhesive to glue them together) or you can end up buying a little thicker grip liner this time.
Some Useful Tips
We have some furniture which we move occasionally like beds, sofas, wardrobes, etc while we have some furniture we move often like dining chairs. For furniture you move frequently it helps to glue the pads to the furniture legs. You can also use silicon adhesive for this.
Wipe under the leg of the furniture, and paint some glue on it. Paint it in a zig-zag style. Carefully stick the pad you have made to each leg. Wait until it becomes dry then carefully turn the furniture upright. You are done.
Don’t use cheap materials while crafting these furniture grippers. They will not last long if you do not use sturdy cardboards and grip liners.
Before placing the pad under the furniture make sure that the surface of your furniture’s leg is even and smooth. Otherwise, the uneven, bumpy, or sharp surface will cut through the grip eventually and it will start harming your hardwood or tiles floor again.
Always place the smooth surface of the pad up and the textured surface down to the floor. It helps it to stick to the floor.
To Sum Up
DIY furniture grippers can be a simple, low-effort, and cost-effective way to prevent damage to your floors.
Now, no matter how many times your kids jump on the sofa or in the bed, these DIY furniture grippers aren’t going to let your furniture move. No matter how many times you move your dining table and change the design of your rooms, no stains or unwanted marks are going to be left on the floor again.
Additionally, you don’t need to pull things up to move from one place to another. So, make things easy, stay happy, and start making your own furniture grippers at home.