 In case you’ve a concrete subfloor, then there’s a good chance that you can go with almost a wide range of flooring types for installation.
One of the many types that are hugely popular is laminate flooring. It’s not only pleasant in looks but also relatively simple in installation.
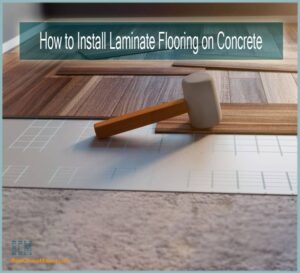
When you have a concrete slab, the laminate flooring goes very nicely on top of it once you know where to start. So today let’s know the entire process of how to install laminate flooring on concrete.
Laminate Flooring Installation Over Concrete
Let’s get onto the main topic of how you can actually install the flooring over concrete right below.
Preparing the Concrete Subfloor
So, first of all, you need to start with preparing the concrete floor for laminate. For that remove the baseboards using proper tools. You can use a hammer and a pry bar for this. It will help you to easily detach without causing any breakage.
Installing laminate flooring on uneven concrete Can lead to very displeasing results. So, make sure you check how level it is beforehand. It should come with no variance on every 10 feet of area. Or at least not more than 3/16th inch of variation in the ten feet area unit. If there is any, you need to mark down those areas. And also, you’ll have to PUT some extra efforts here for leveling the problematic areas.
A concrete grinder should help you here. Simply use the tool over any high spots on the concrete subfloor. Go gradually and grind down those problematic spots. In the case of low areas, you can fill those up using some leveling compound.
You want to mix the leveling compound first in a bucket and then apply it using a trowel. Let the applied compound dry properly. Then you can grind down in case there’s any high spot that needs grinding.
Installing Underlay
With a concrete subfloor, one of the major hassles you’re going to face is moisture. Since it’s a porous material, there’s a good chance that water will sweep up into it and come through your flooring. As a result, the adhesive will go weak. And this will cause the flooring planks to warp. Sometimes there’s also a chance of mold and mildew developing.
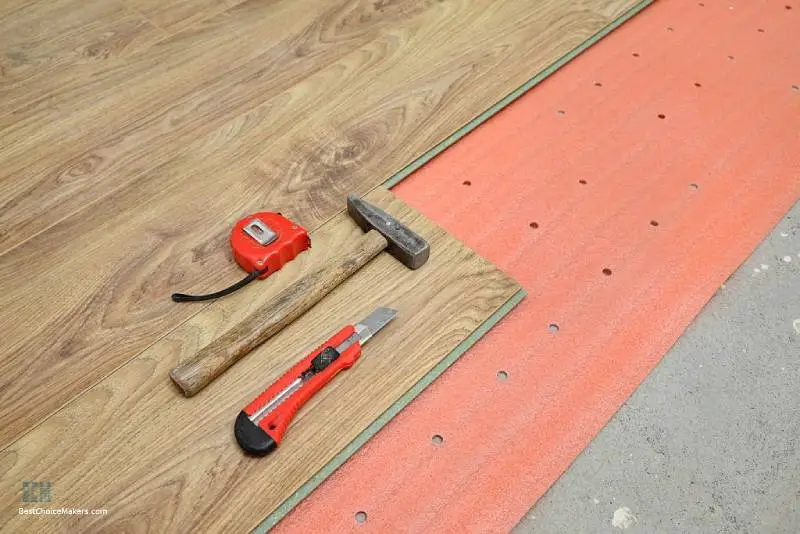
So, with a concrete underlay installation, you should think about a laminate floor underlayment that will work as a vapor barrier. It will keep those moisture prevented from penetrating through laminate flooring. You can go for a plastic vapor barrier that is at least six mm thick. Simply lay it on the concrete subfloor and use some underlayment tape or any seam tape to secure it. The manufacturer’s instructions will help you with the installation quite well. You can also include a laminate padding layer on top of this vapor barrier. So that it does feel more comfortable walking on the floor.
Editor’s Special Mention about Underlayment
Since we are talking about laminate flooring, here’s a fabulous system you need to know about.

Those who are out for a solution that can not only give insulation and underlayment benefits but also heating, moisture-wicking, and even noise defeating advantages, have a look at the Hardwood and Laminate Floor Heating Mat System.
It’s a trouble-free but exceptional answer to four different problems, and at the same time relatively easy to get installed. The EL-listed mat might just be what you’re looking for, so we had to mention it.
You May Read: 6 Best Laminate Floor Cleaning Machine
Laminate Flooring Installation
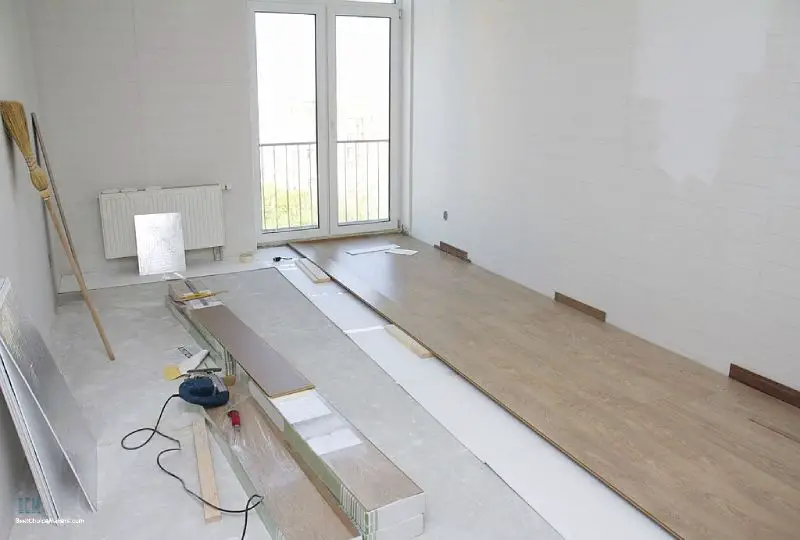
Start by placing laminate flooring on top of concrete inside the room. So that the flooring can adjust to room temperature as well as humidity. You need to keep it that way for at least three days before installation.
From the first row of laminate flooring, you need to cut the tongue off using a table saw. The tongue side needs to be facing the wall while you lay down the flooring’s first row. The manufacturer’s guide will mention an expansion gap that you must follow on every wall in the room.
You need to focus on the first three rows and piece them far from the wall. As soon as you are done assembling, you should slide flooring into the spot right next to the wall. Using a circular or miter saw cut end pieces. Let the back part of the plank in laminate be facing the saw while you cut it. and this will help in avoiding chips.
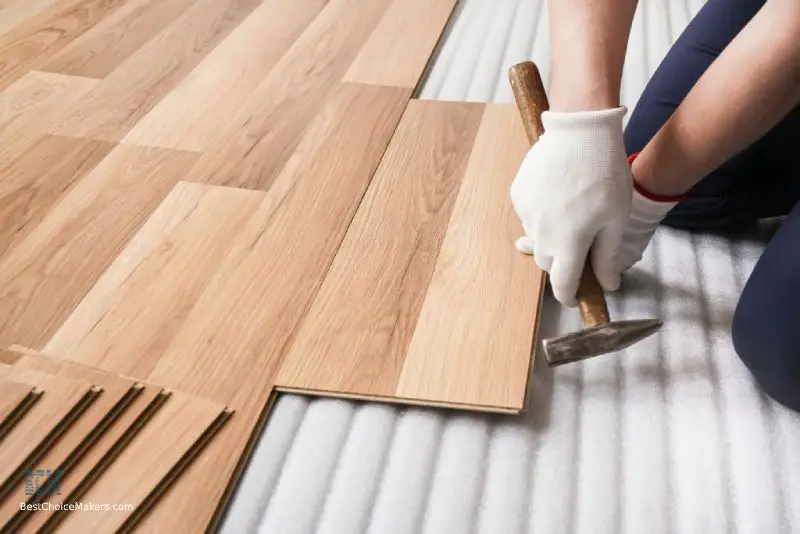
Maintain at least 12 inches from one another while staggering joints. You need to fit the groove and tongue pieces together. Simply insert the tongue at an angle into the groove to do so. Use a hammer and tapping block for inserting the tongue at an angle, in case it seems not to work. And the tongue will fall right into place.
Keep on piecing flooring just like that until you reach the very last row in your room. If you face things like heating vents, simply go for any needed cuts using a jigsaw.
Once you reach the very last row, calculate the distance between it and the wall. You need to minus the expansion gap from whatever measurement you’ve got. And then you’ll get your final measurement for the last row of laminate flooring. Cut the last plank using a table saw following this size. Then finish it up by installing transition strips, molding, and baseboards.
How Many Boxes of Laminate Flooring do I Need
To calculate the total number of boxes for laminate flooring that you’ll need in a certain space, simply follow a simple method. First of all, you need to find out the square footage figure. In the case of a typical rectangular or square shape room, this calculation is pretty straightforward. You need to calculate the length and width of your room and multiple both.
In case your room is not entirely rectangular, then you need to split it down a bit. You want to section it into tiny rectangles. So that you can calculate the square footage of all those sections and add it up. And the sum will be your required square footage.
However, when you are working on laying laminate flooring it’s important to be safer by assuming some extra. So, make sure you buy a little bit more than what you’ll need when purchasing the flooring. And that way, in case you end up with unforeseen damage, accident, or mistake, there will be some extra flooring available to cover it up. It’s called the waste factor. Usually, you should consider somewhere between 5% to 10% for this waste factor and add it to your square footage.
For example, if you have calculated 200 square feet for your footage, then add 5% of this figure, which is 10 square feet. And the final square footage you need to consider will be 200+10 = 210 square feet.
You can simply use the online laminate floor calculator for layout for finding out room area, needed packages or boxes for your space, necessary plank numbers, and more.
To manually count the number of boxes necessary, you need to check the content on the packaging. It should come with an sq. ft. figure. You need to divide your room’s square footage with the box’s listed sq. ft. to find out the desired number. If it’s not a whole number, then simply round it up. And that’s the number of boxes you’ll need for this project.
For example, if a box content shows 25 sq. ft. then you’ll divide 200 sq ft by it and the resulted figure should be 8. So, you’ll need 8 boxes for installation.
How Long Does It Take to Install Laminate Flooring?
For a 10’-by-20’ room area, you’ll need between 4 to 5 days for the installation. Here 2 to 3 days are for acclimation of laminate flooring to the room environment and rest will be for actual installation process. Depending on your DIY skills, it can fluctuate though.
Wrap Up
And that was how to install laminate flooring on concrete subfloor. This popular synthetic flooring is now taking place in so many households. And that’s because of its flexibility in price and function.
If you feel the process of installation is complex and hard to complete, then go for professional help. Hiring an expert will also give you a guarantee of a smoother result by the end. It may make you spend a bit more than trying things yourself, but the overall output is so much worthy.