 There’s a lot of style and formats going on with laminate floorings these days. In case you are thinking of replacing old one, then proper removal of it is very important for the new one to settle correctly.
And when you are trying to remove the flooring, it’s important to know what type you’re focusing on. Usually, it’s about how to remove glued laminate flooring from concrete since that’s the most common setup. And this is also relatively less painful plus you possibly won’t need any professional help. However, the floating laminate floor setup is also quite common.
So, let’s find out how to remove laminate flooring that is attached through these two usual methods.
Lets Get Start to Remove Laminate Flooring with Easy Steps
Before we move onto the actual process of how to remove old laminate flooring, here’s something you should know. With a floating or snap together laminate, you can reuse the removed pieces. However, these are very easy to chip and break so you should be extremely careful. With glued laminate, you cannot reuse it and so, being reckless with removal won’t actually cause much trouble.
Also, the glued flooring isn’t actually stuck with floor. Instead, the planks are glued to each other. So, some people try to pry up the planks manually. However, if there’s a case of glue seeping down and causing plank to glue with subfloor underneath, then things become a bit more severe to handle. Then you need to either melt down that glue for removal or use a motorized floor stripper.
The Materials You’ll Need
-
- A shop vacuum
- Heavy-duty glove made of leather
- Heavy-duty shoes or boots
- Utility knife
- Eye protective wear
- Side cutter
- Hammer
- Drywall knife of 6 inches
- J end included flat bar
- Chisel
- Felt tip marker
- Heat gun and floor scraper (optional)
Preparation
The edges of laminate floor are pretty sharp. And so, there’s a good chance of it slicing your skin. So, you should wear a proper heavy-duty glove. Go for the one made of leather for best protection. Those chips from laminate planks are easy to fly and get into your eyes too. So, you should consider wearing some sort of eye protection. Wear heavy-duty shoes or boots since there will be a lot of movements that can hurt your feet. Make sure you move all furniture out of the room. This will make accessing these planks better and easier.
Removal of Baseboards
Now it is time to focus on removing baseboards. This is basically in charge of covering all flooring edges that are around the perimeter of your room. Along the top edge of all baseboard molding, you want to carefully make a cut using a utility knife. So that you can cut through any paint that might be bonding the wall and base. And this should help with avoiding any tear in drywall when you pry off.
Between the baseboard and wall, simply place a wide six-inch drywall knife. Now between the board and knife, slide a flat bar. As you pry, the drywall will help to protect wall and avoid damages this way. As soon as you are done removing board, work on clipping the stuck nailed on wall using a side cutter. There can be remaining protruding nail shanks, simply use a hammer to drive those into the wall.
Using a felt marker, simply number down the pieces and wall. So that you know the positioning when installing a new floor here. Do this before moving onto your next piece of molding. Until you get rid of all baseboards, keep on repeating the process for entire room.
Remove the Transition Strips
It’s time to pull the transition strips up. Or there can be noticeable strips in your room’s doorway, that basically work for covering seams in flooring. Sometimes it’s there for making two flooring types transit smoothly from one to another.
You need to slide the flat bar’s J end right beneath this transition strip. And then carefully pry it up. There should be screws that hold the channels to floor. You need to remove these as well. Make sure you are careful and gentle with this part. You don’t want to break or damage the transition strips.
Removing Laminate Flooring
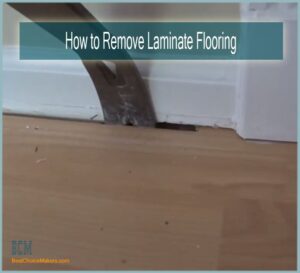
Time to remove the floor itself. Here also you need the J ended flat bar. Just slide it right onto the gap between first-row plank and your wall. And then pry it about 45 degrees. In the case of floating laminate planks, this should be enough to separate them.
However, if its glued, then the easiest way to remove laminate flooring is to hold planks with your hands and snap it for breaking glued seams. You need to continue with all planks in the first row using same manner of removal.
Once you are done with the first row, insert chisel on additional plank and lift it up. Keep on following the process for covering all planks and rows.
Get Rid of The Foam Padding & Clean the Floor
You need to get rid of the foam padding as well. In the case of a glued laminate, you’ll need a simple floor scraper and a heat gun for melting and removing remaining residue easily. After that follow it up with vacuuming so that there are no wood or laminate chips. Also, place those base trims in a safe place to avoid any damage. You are now completely ready to install the new flooring.
Wrap Up
And now you know pretty much everything about how to remove laminate flooring. Some people may think that tearing out the floor is a headache. But with laminate flooring, it’s actually not that challenging if you know right way based on the type.
Of course, having the proper tool for removal is also important. If you are new to such chores, never do this without proper protective wear. People take wearing gloves, safety goggles, and working boots less seriously. And that is really not an ideal way to start something like this for a beginner.
So, Pay Attention to That!